How to Create Custom PDF in Zapier with Eledo
Zapier is an online tool that helps you connect applications and create automated workflows for repetitive processes. In many cases you may want to place important information from these applications into documents.
With Eledo, you can now achieve this in an effective and automated way. In this article we will show how to easily integrate Eledo into your Zapier workflows (Zaps).
Adding Eledo into Zapier
Keep in mind that the Zapier integration is currently in closed beta. This means it will not appear in the Zapier public directory yet and you will need an invitation link to access it.
Accept the invite and start building your Zaps with Eledo.
Setting Up Your Eledo PDF Template
With Eledo you can:
- create custom PDF documents
- upload PDF forms that should be automatically filled
In both cases you need to define data expressions. These expressions tell Eledo which information from other applications should appear in the generated document.
Data expressions usually consist of:
- field names
- functions
- operations that modify values
In the following example we demonstrate how to prepare a template in Eledo and connect it with Zapier.
Let's imagine we want to generate a PDF product sheet from Shopify containing attributes such as:
- product name
- price
- quantity
- weight
With Eledo automation, these values can automatically appear in the generated PDF whenever a new product is created in Shopify.
Creating the Template
The first step is creating a PDF template in Eledo using text boxes that represent data expressions.
Simply enter the attribute name that should appear in your document.
For example, if you want the product price to appear in the document, insert a text box with the corresponding attribute name.
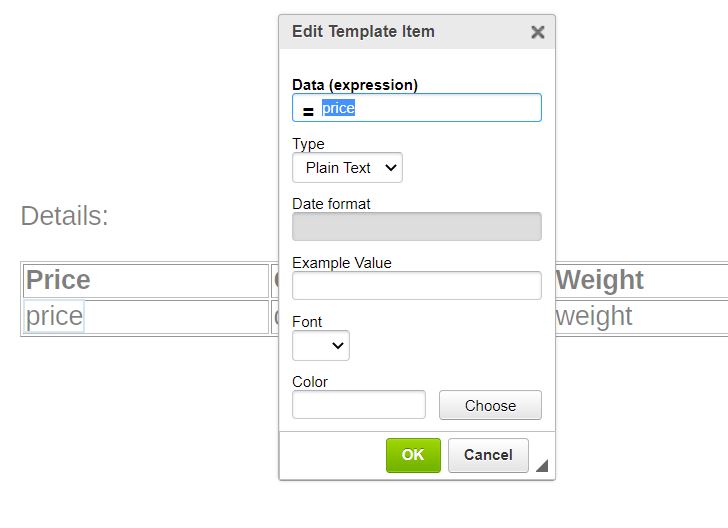
Repeat this process for all attributes you want to include in your document.
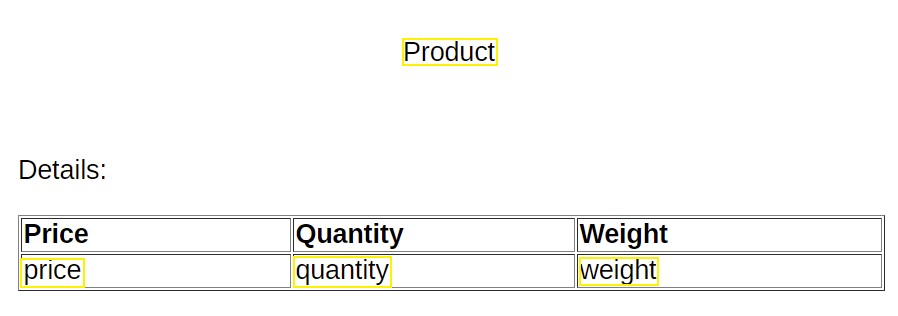
In our example we include:
- product name
- price
- quantity
- weight
The final template may look like this:
Building the Zap
Once your template is ready, you can start building your Zap in Zapier.
1. Choose a Trigger
Select the application where your data originates.
In this example:
- Application: Shopify
- Trigger event: New Product
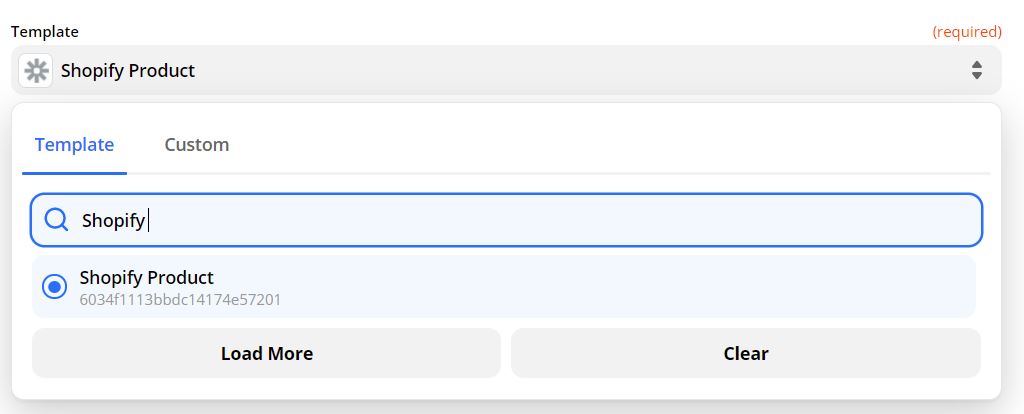
2. Create the Document with Eledo
Add an Eledo action step to generate the PDF.
In the Set up action section:
- choose the template you created in Eledo
- in this example we use Shopify Product
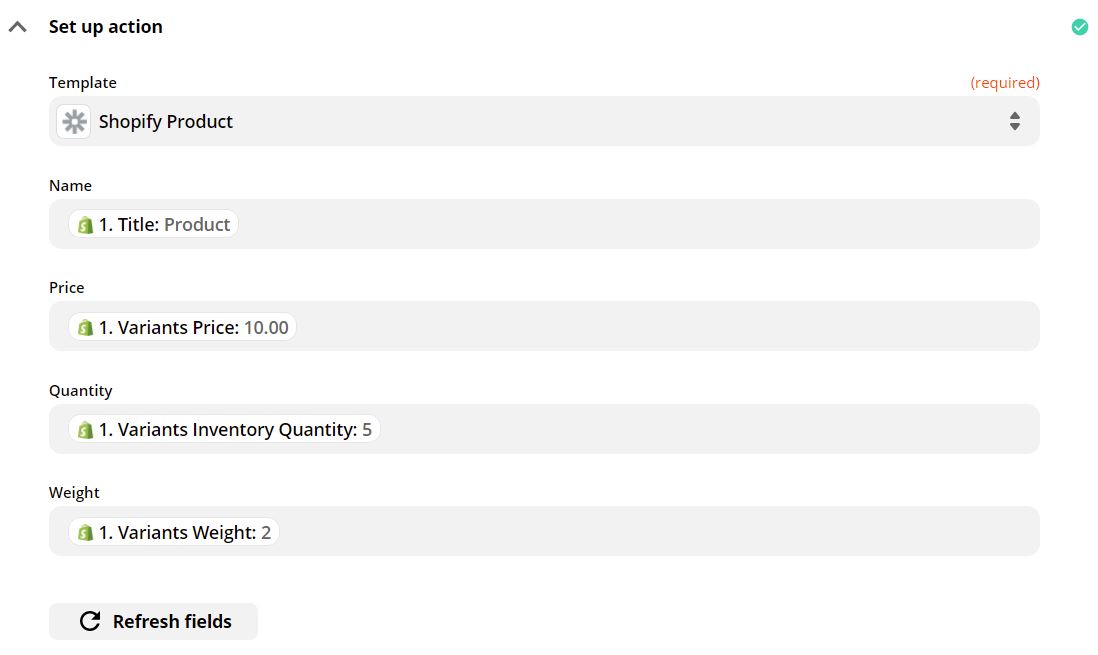
3. Map Template Fields
Now connect your template fields with the data coming from Shopify.
In this example we map:
- name
- price
- quantity
- weight
The final mapping configuration should look like this:
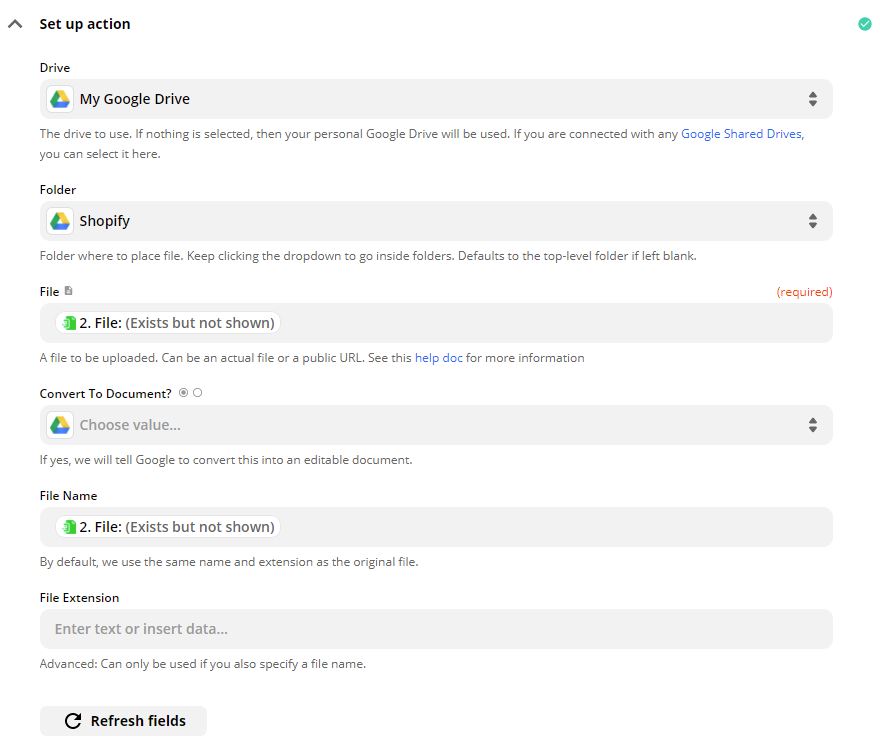
4. Send the Generated PDF
Finally, choose the application where you want to store or send the generated document.
In this example we use Google Drive.
When configuring the step, make sure to populate:
- File
- File Name
using the PDF generated by the Eledo step.
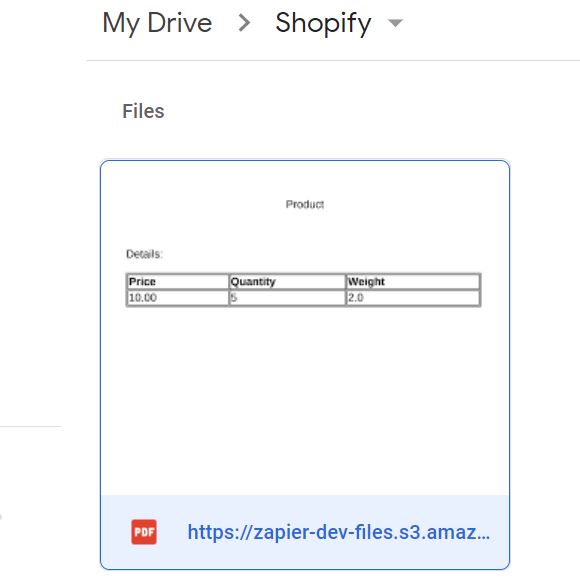
Example configuration:
Once the Zap runs, the generated PDF will automatically appear in your Google Drive.
Error Handling
If you configured everything but the PDF is not generated, the issue is often related to the Eledo template configuration.
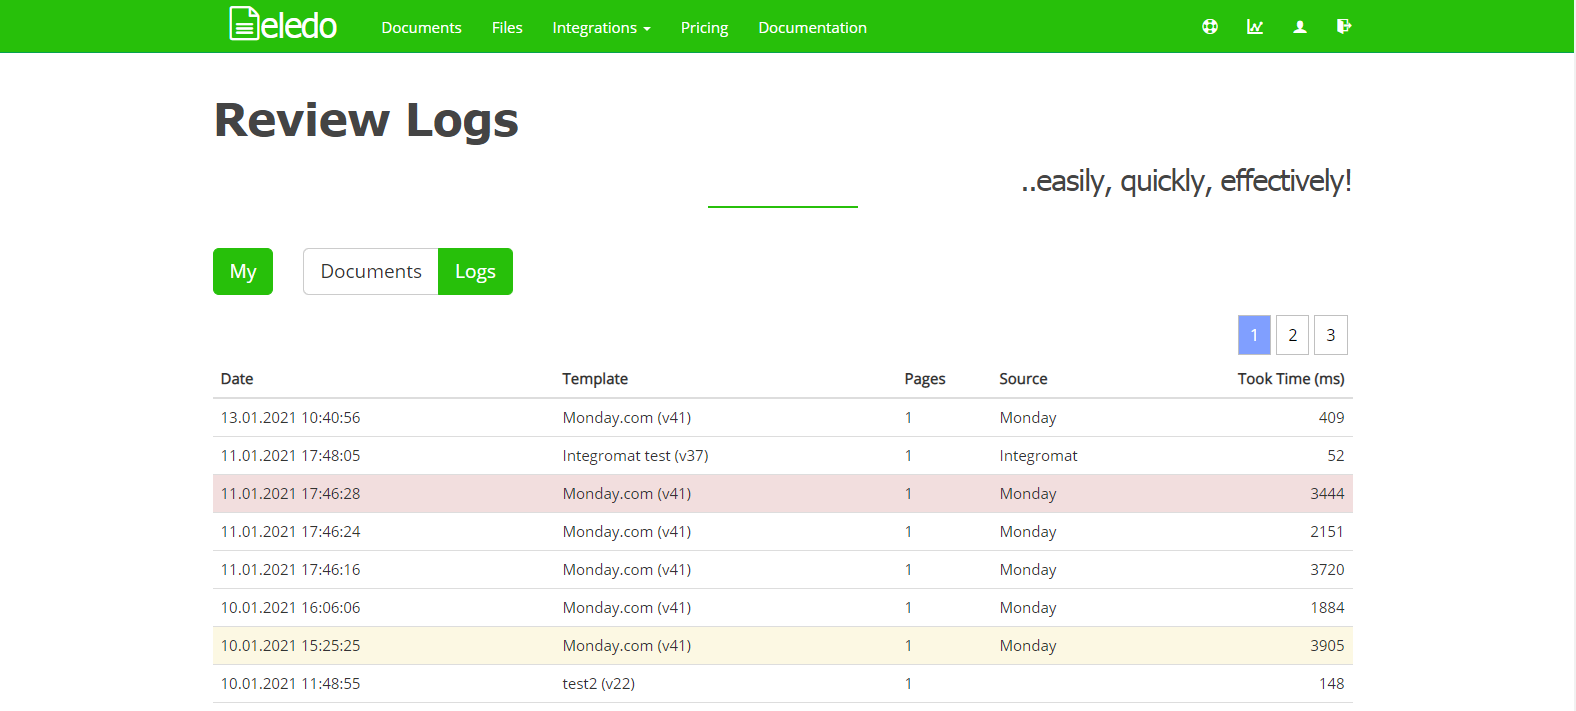
Eledo records every PDF generation request as an event and stores a log entry.
Each log includes:
- date and time
- event source
- template used
- statistics such as page count and generation time
Important: Eledo does not record transactional data (the actual content of the request).
Logs may also contain warnings and errors that help identify the issue.
You can view these logs in the Eledo dashboard.
Helpdesk
If something is not working as expected, feel free to contact the Eledo Helpdesk.
We hope this automation will save you a lot of time. We will also appreciate your feedback.