Printing Image
This guide shows how to print images into your PDF using n8n.
Step 1 — Prepare your template
In the Eledo editor:
- Add a Dynamic Image component
- In Data (expression), enter a field name (for example
image_url) - (Optional) Set width or height
- Confirm and save the template
If only one dimension is set, the other is calculated automatically to preserve the aspect ratio.
tip
Learn more about Dynamic Image:
→ /docs/product/template-editor/components/dynamic-image.mdx
Step 2 — Use the template in n8n
In your n8n workflow:
- Add the Eledo PDF node
- Select your credentials
- Choose your template
- Make sure Input is set to Guided Fields
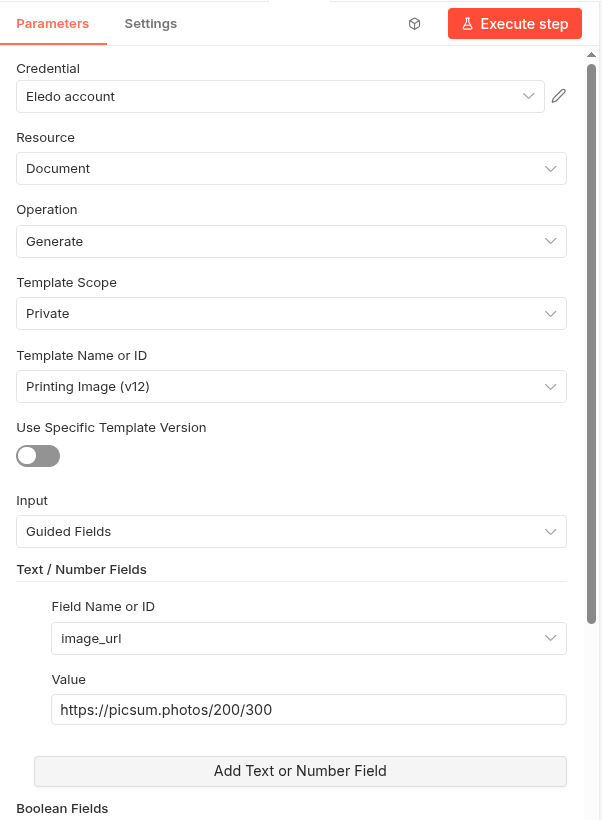
Step 3 — Add and fill the field
In the Eledo node:
- Click Add Text or Number Field
- Select the field (for example
image_url) - Enter an image URL into the Value field
Important notes
- The image must be accessible via a public URL
- Invalid or inaccessible URLs will result in a missing image
Result
When the workflow runs:
- the image URL is passed to Eledo
- Eledo loads the image
- the image is rendered in the document
Next steps
- Print multiple images → Printing Images in Line
- Build full workflow → Generate Your First PDF
Was this article helpful?
Yes
No