Data Input
Data input is configured in the Eledo step under the Configure tab.
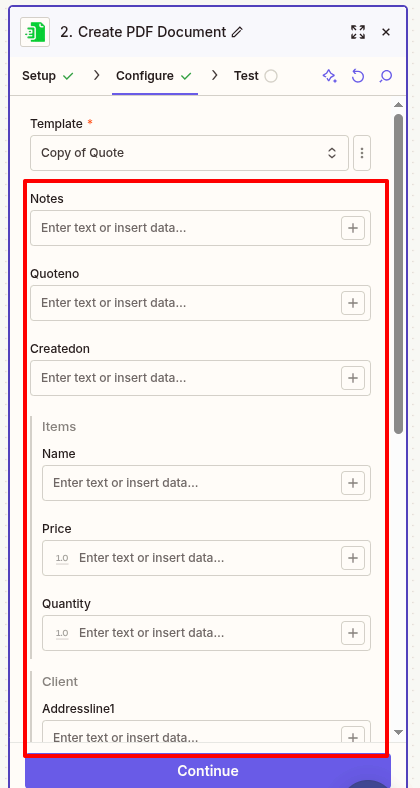
First, select a template. Once selected, Zapier automatically retrieves the template schema and generates a dynamic UI form that mirrors all template fields.
This is currently the only supported way to bind your data to template fields in Zapier.
The Zapier integration currently lists only your private templates. Public templates must first be copied into your account before they can be used in a Zap.
Assigning data to template fields
Because the form structure matches your template exactly, assigning data is straightforward.
In Zapier, all input values are treated as text. Whether the original value is a number, date, or string, it is passed to Eledo as text.
You have three options when filling template fields:
- Map the field to data from a previous step in your Zap
- Enter a static value that will be used in every execution
- Leave the field empty
You are not required to populate every field. It is up to you to decide which fields should receive data and how.
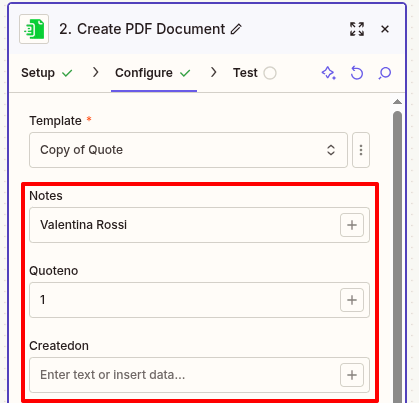
Assigning a static value
To enter a static value, click the desired field and type the text directly.
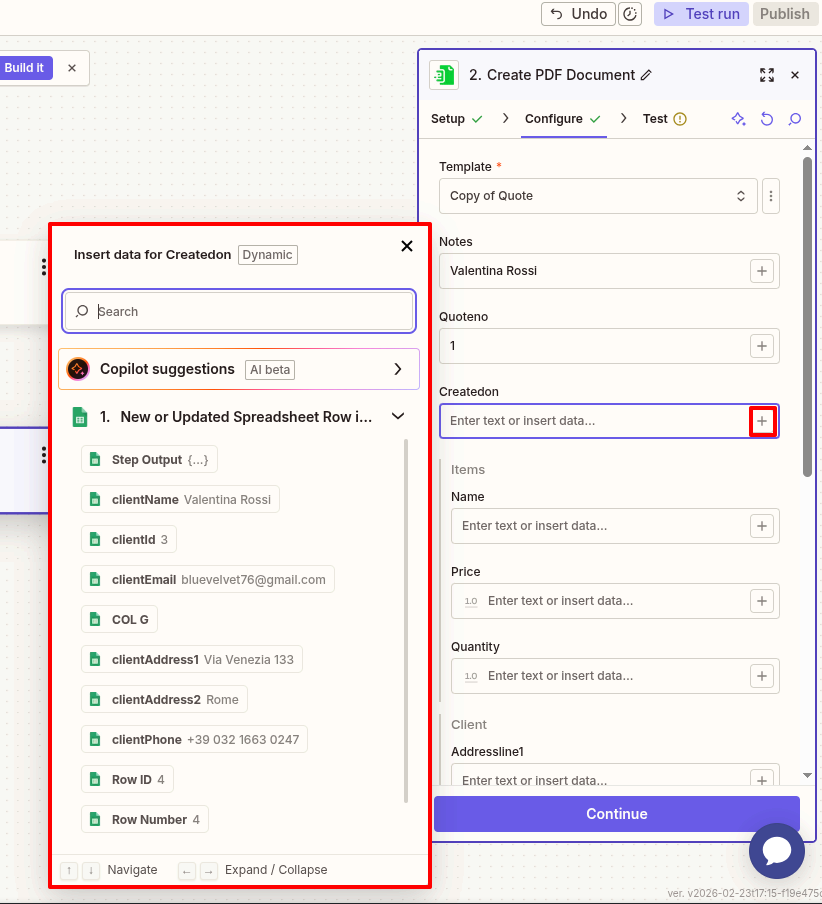
Assigning a dynamic value
Dynamic values come from previous steps in your Zap — for example, a column from Google Sheets.
To insert dynamic data:
- Click the
+icon next to the field. - Select a value from the available list.
Zapier displays all outputs from previous steps in a searchable panel.
Make sure a data source step (such as Google Sheets) is properly added and configured before mapping dynamic values. Otherwise, Zapier will prompt you to configure one.
Zapier allows you to insert multiple values into a single field. In such cases, the values are typically combined into a single text string.
In most scenarios, one value is mapped to one template field.
Complex data
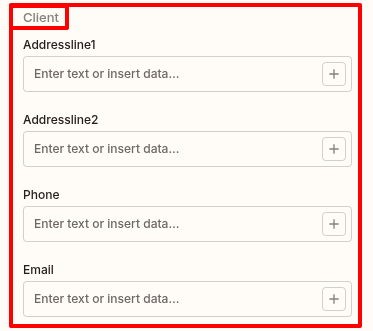
Zapier’s dynamic UI supports not only simple fields (text, number, date) but also structured objects defined in your template.
For example, if your template contains a nested object like a Client section, Zapier will display its fields grouped together.
From your perspective, this behaves the same way as filling simple fields — you assign values individually to each visible field.
Limitations
- Only private templates are available in the Zapier integration. Public templates must first be copied into your account.
- It is not possible to select a specific template version. The latest published version of the template is always used.
- Array-type fields (for example, lists of items) are currently displayed as a single entry in the Zapier UI. This means you can define one item directly in the Eledo step.
If your workflow requires multiple items, additional processing outside of the Eledo step may be necessary. This area may evolve as the integration develops.