Build a Zap Using Copilot AI
Introduction
In this guide, we demonstrate how to build a Zap using Copilot AI inside Zapier.
This guide is intentionally brief. The goal is to show you where to start and what to verify. AI-assisted setup is interactive by nature, so it cannot be described fully step by step.
If you get stuck, refer to our original guide.
What You Will Build
We will create a Zap with three components:
- Data source — Google Sheets
- Eledo — PDF generation
- Data sink — Google Drive (stores generated PDFs)
Once you understand this pattern, you can adapt it to other data sources and storage systems supported by Zapier.
Step 1 — Create a Simple Template in Eledo
For this guide, we will use a simple template with a few dynamic fields.
Instead of creating a template from scratch, we recommend selecting one from the public template library and modifying it. This allows you to get started quickly.
If you prefer to create a template manually, refer to:
Template Editor
Instructions
- Log into your Eledo account.
- Open My Templates.
- Click From Library to access the public template catalog.
- Select a template and click Try it out.
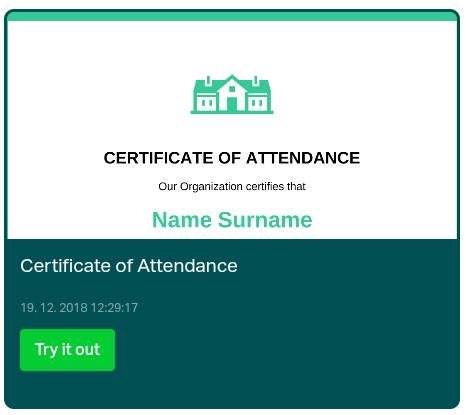
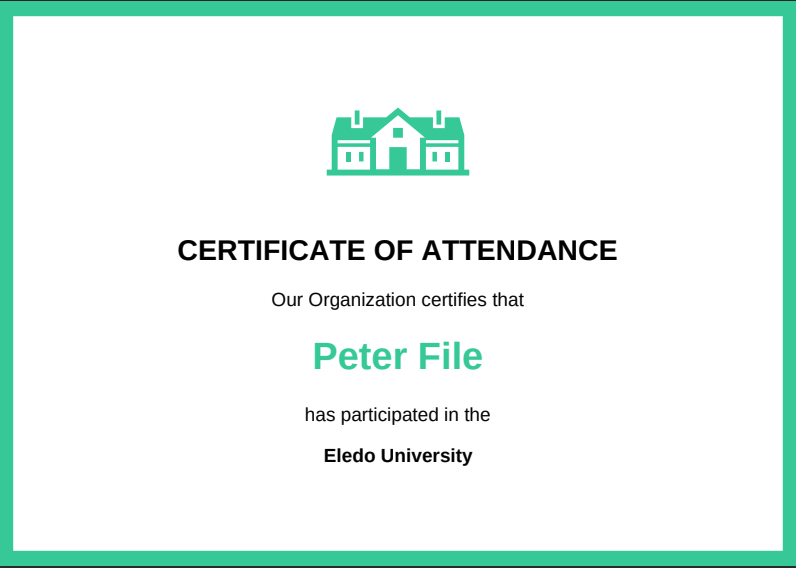
This creates a private copy under your account. - For this guide, select Certificate of Attendance.
You can freely modify your private copy.
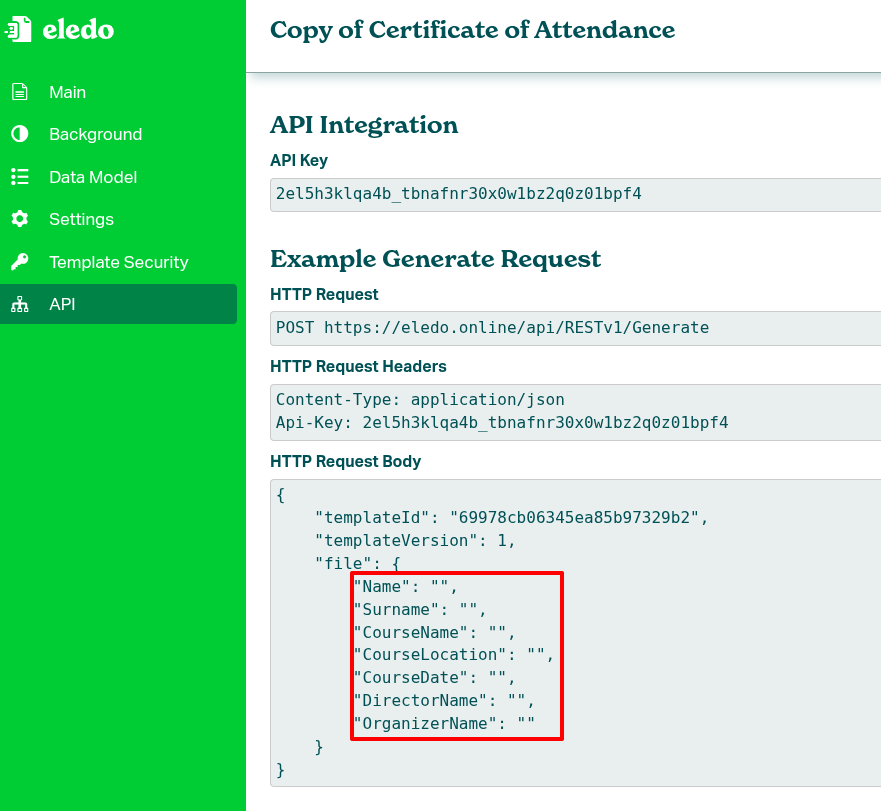
Optional — Inspect the Data Structure (Advanced)
Open Profile → API in the left-side menu.
You can review the payload inside the HTTP Request Body section. This helps you understand how fields are structured before mapping them in Zapier.
Step 2 — Create a Google Sheet
Create a Google Sheet with the following structure:
| Name | Surname |
|---|---|
| John | Smith |
| Peter | File |
Each row represents one student.

The first row must contain headers. Zapier automatically uses these headers (Name, Surname) as property names.
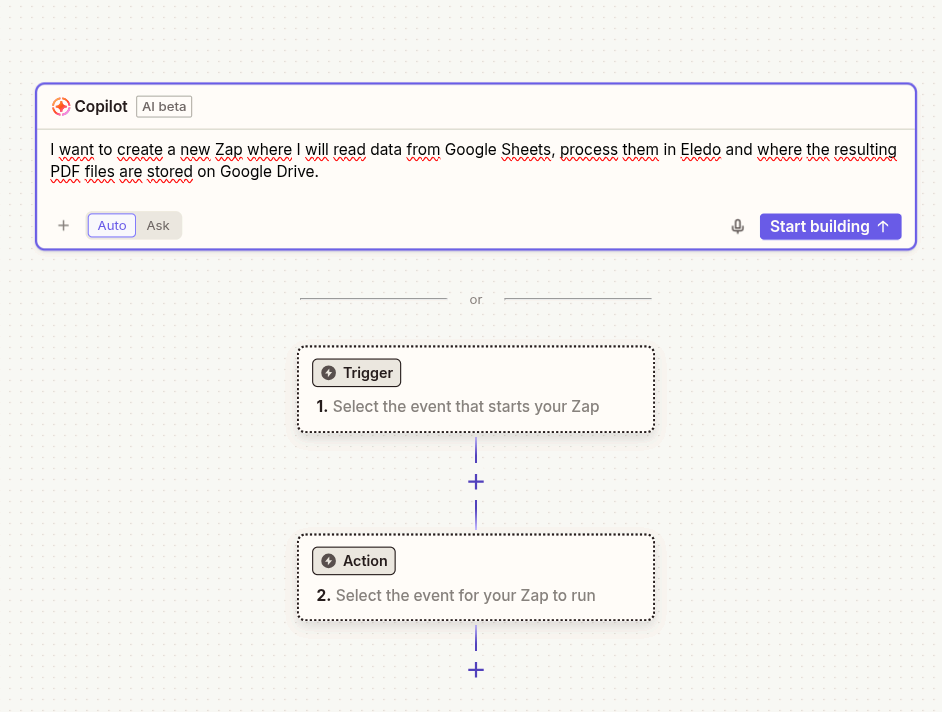
Step 3 — Ask Copilot AI to Create the Zap
- Create a new (empty) Zap.
- At the top of the editor, locate the Copilot AI prompt.
- Describe the flow you want in plain language.
I want to create a new Zap where I read data from Google Sheets, process them in Eledo, and store the resulting PDF files in Google Drive.
See the screenshot below for reference.
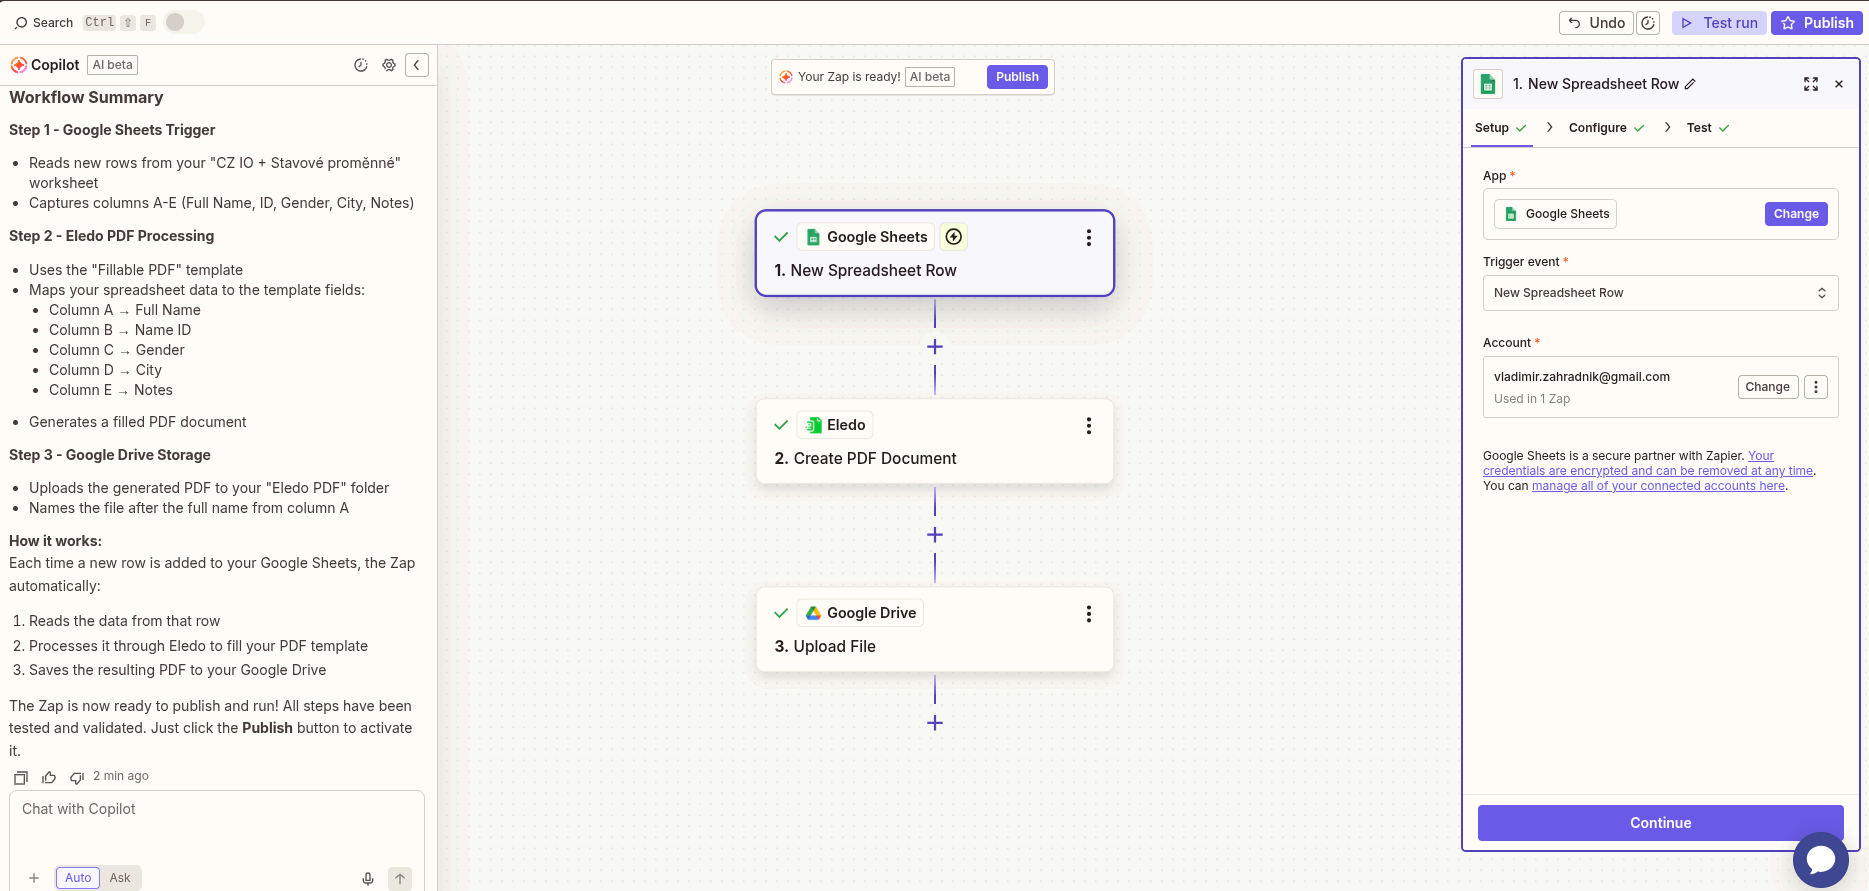
After you submit the prompt, Copilot will guide you through the setup process.
It may:
- Ask you to authenticate Google Sheets, Google Drive, and Eledo
- Test whether the apps are properly configured
- Ask clarifying questions
- Suggest adjustments
It is safe to experiment while the Zap is not published.
Copilot is usually successful at setting up the basic structure (trigger → action → storage). However, it primarily ensures that the apps can communicate.
If Copilot gets stuck, it will explain what needs to be fixed. After resolving the issue, you can instruct it to continue.
Step 4 — Verify and Correct the Configuration
Even if Copilot builds the Zap automatically, you should manually review the configuration.
Common adjustments:
- Verify that the correct Google Sheet and worksheet are selected.
- Ensure the proper Eledo template is selected.
- Map dynamic fields manually if needed (see the original guide).
- Confirm that Google Drive points to the correct folder.
After verification, test the Zap and adjust any remaining issues.
What’s Next?
You now have a working automation:
Google Sheets → Eledo → Google Drive
From here, you can:
- Add more rows and observe automatic PDF generation
- Replace Google Sheets with another trigger app
- Replace Google Drive with email, CRM, or cloud storage
The pattern remains the same.